OpenStreetMap Raster Tile Server : A Long Journey
So, I stumbled across this map.
Looks like a very normal OpenStreetMap web map, at first. Or maybe not?
To confirm my suspicion, I clicked the “controls” button, then clicked the “layer” icon on top right.
Now it’s apparent that this default basemap is not your usual OSM basemap. There is a difference.
Now, let’s take a peek at its source code.
The default basemap is using a custom tile server, hosted on own’s server.
The author of this web-map has created a comprehensive guide on how to build your own custom tile server, probably based on the experience of building this tile server.
Since I, too, quite curious on how to make my own custom tile server — based on my own map style —, let’s “follow” the guide step by step.
Please note that since right now I don’t have a proper machine to replicate all the steps directly, I analyzed the guide — textually — instead of actually verifying it right in the machine.
Prepare The OS
First, install Ubuntu, then install all the updates.
sudo -i
apt update
apt upgrade
Based on this askubuntu answer, the command 'sudo -i' causes all subsequent commands you run to be executed as if you had run them with sudo. So, there's no need for repeated 'sudo' like 'sudo apt update, sudo apt upgrade'. We just need to use 'sudo -i' once at the beginning.
Based on this freecodecamp article, “update” command fetches the latest version of the package list but it will not actually download or install any of those updates. Meanwhile, “upgrade” command actually downloads and installs the updates.
Next step, download and install all the tile-server prerequisite software. Before that, configure Ubuntu to use the universe repository.
Based on this official Ubuntu documentation, “universe” is one of the four main repositories. It includes the community-maintained free and open source software.
Then, download the first batch of tile-server prerequisite software.
sudo apt install libboost-all-dev git-core tar unzip wget bzip2 build-essential autoconf libtool libxml2-dev libgeos-dev libgeos++-dev libpq-dev libbz2-dev libproj-dev munin-node munin libprotobuf-c0-dev protobuf-c-compiler libfreetype6-dev libtiff5-dev libicu-dev libgdal-dev libcairo-dev libcairomm-1.0-dev apache2 apache2-dev libagg-dev liblua5.2-dev ttf-unifont lua5.1 liblua5.1-dev libgeotiff-epsg curlPrepare The Database
Then, download and install PostgreSQL to store the OpenStreetMap data.
sudo apt-get install postgresql postgresql-contrib postgis postgresql-10-postgis-2.4 postgresql-10-postgis-scriptsThen, configure the database, with its proper postgis extension configuration.
sudo -u postgres -i
createuser renderaccount
createdb -E UTF8 -O renderaccount gis
psql
\c gis
CREATE EXTENSION postgis;
ALTER TABLE geometry_columns OWNER TO renderaccount;
ALTER TABLE spatial_ref_sys OWNER TO renderaccount;
\q
exit
Then, install osm2pgsql.. right from its source. It is used to import OSM data to PostgreSQL database.
mkdir ~/src
cd ~/src
git clone git://github.com/openstreetmap/osm2pgsql.git
cd osm2pgsql
sudo apt install make cmake g++ libboost-dev libboost-system-dev libboost-filesystem-dev libexpat1-dev zlib1g-dev libbz2-dev libpq-dev libgeos-dev libgeos++-dev libproj-dev lua5.2 liblua5.2-dev
mkdir build && cd build
cmake ..
make
sudo make install
Download and Standardize The OSM Data
Then, download the OSM data. In this guide example, we will download a small patch of region instead of the whole planet (Derbyshire county, ~ 20 MB).
mkdir ~/data
cd ~/data
wget http://download.geofabrik.de/europe/great-britain/england/derbyshire-latest.osm.pbf
Before we are dumping the whole raw OSM data to the database, we could perform some data transformation to its data tagging structure. This is very useful if you want to make your own map style, especially to somewhat “standardize” several different tagging scheme used by various mappers into one coherent tagging scheme.
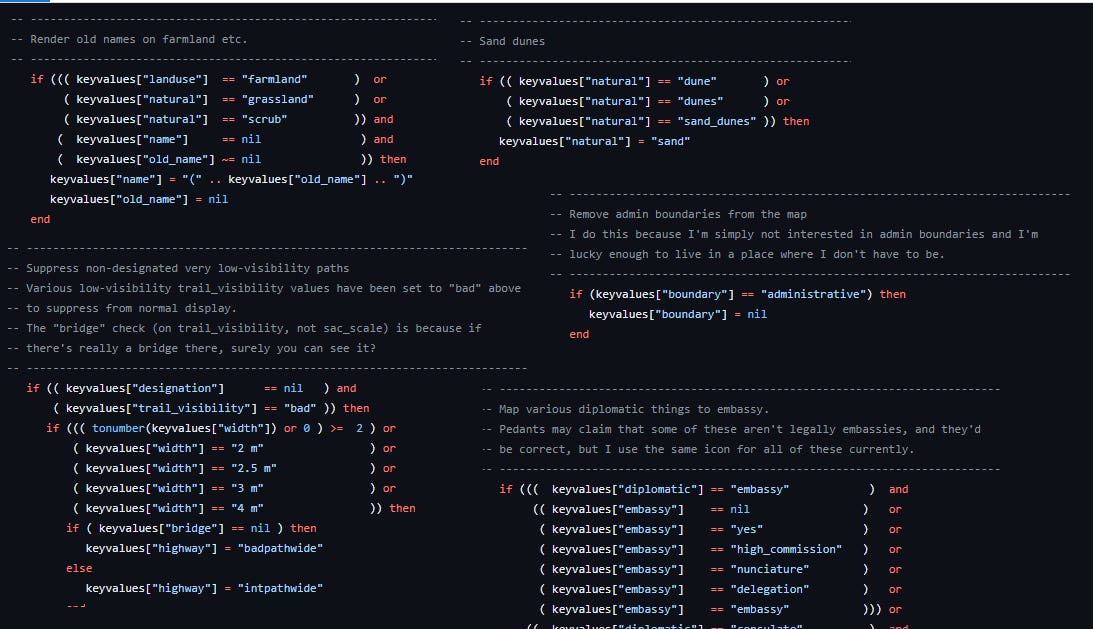
Here’s one of the “secret sauce” behind this custom map-style : style.lua. Quite a complex rule that maps the raw OSM tagging data into your own preferred map style.
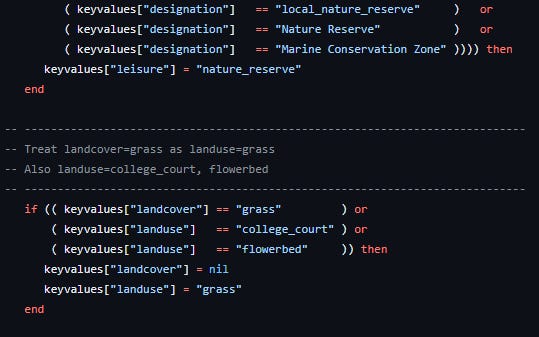
Here’s a quick example :
By utilizing this Lua tag transform script, we can automatically identify all instances of data containing "landcover=grass", "landuse=college_court", and "landuse=flowerbed", and assign a single unifying tag to all of them: "landuse=grass". This unifying tag will be recognized by the map style, resulting in a uniform rendering.
Now repeat this process to every OSM tag that you want to render in your custom mapstyle.

Then, we will use this script to “transform” OSM’s raw tagging data, then put it into PostgreSQL database.
cd ~/src
git clone https://github.com/SomeoneElseOSM/SomeoneElse-style/
git clone https://github.com/SomeoneElseOSM/openstreetmap-carto-AJT

osm2pgsql -d gis --create --slim -C 2500 --number-processes 1 -S ~/src/openstreetmap-carto-AJT/openstreetmap-carto.style --multi-geometry --tag-transform-script ~/src/SomeoneElse-style/style.lua ~/data/derbyshire-latest.osm.pbf
Explanation :
-d gis : The database’s name (gis)
--create : Load the data into an empty database rather than appending to an existing one
--slim : One of osm2pgsql’s table layouts that works for rendering.
Based on this osm2pgsql official documentation : It stores temporary data in the database. Without this mode, all temporary data is stored in RAM, and if you don’t have enough RAM, the import will not work successfully. With slim mode, you should be able to import the data even on a system with limited RAM.
-C 2500 : Allocate 2.5 Gb of memory to osm2pgsql import process. Beware that the import process will be killed if it runs out of memory.
--number-processes 1 : Allocate 1 CPU to osm2pgsql import process. If you have more cores available, you can use more.
-S ~/src/openstreetmap-carto-AJT/openstreetmap-carto.style : Path to osm2pgsql .style file. It defines how OSM objects end up in tables in the database.
--multi-geometry : Store OSM’s multipolygon data as a single PostgreSQL’s multi-geometry data instead of splitting it into several geometries and rows.
--tag-transform-script ~/src/SomeoneElse-style/style.lua : Path to Lua tag transform script.
Configure The Stylesheet
Install Mapnik. It will be used to render the final map tile from the OSM data.
sudo apt-get install autoconf apache2-dev libtool libxml2-dev libbz2-dev libgeos-dev libgeos++-dev libproj-dev gdal-bin libmapnik-dev mapnik-utils python-mapnikThen, install “carto” compiler. It is used to convert cartoCSS map stylesheets into the proper mapnik’s style-format.
sudo apt install npm nodejs
sudo npm install -g carto
By using carto, we can define our map style in easy-to-write CSS-like format. We can see the map style on this repository
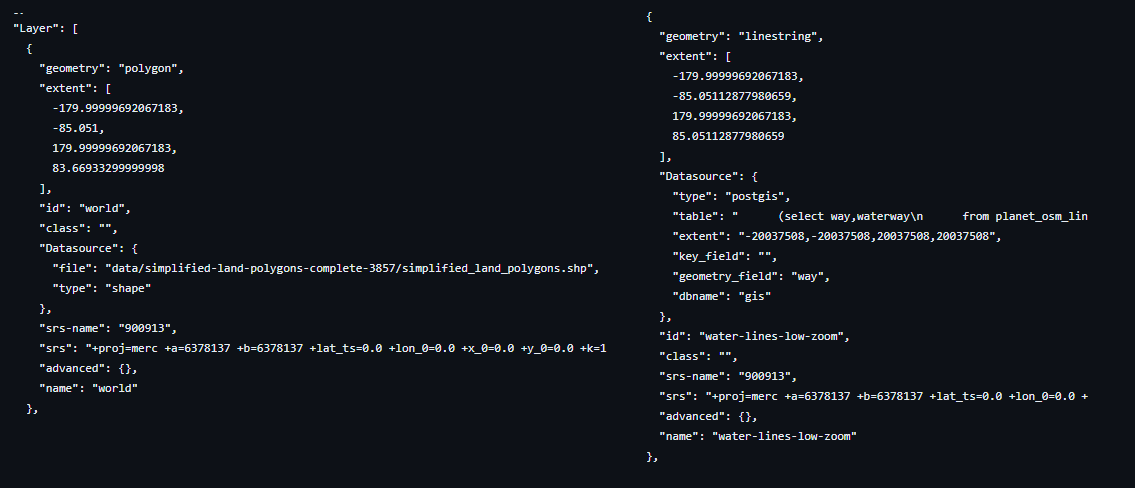
The “main file” that define the core of this map style is the “project.mml”. It selects a portion of map data from various datasources, then adds some tags. Then, we can style each of that tags by using several .mss files.

It seems that not every data that used by this map style comes from OpenStreetMap. For example, on continent-level zoom, this map style used several shp file that represents large land cover. So, we have to download those shp files first.
cd ~/src/openstreetmap-carto-AJT
sh -x get-shapefiles.sh
Once all the data is properly downloaded (and queried from postgresql), we assign name tag to each of them. Then, we can style it by referring to that name tag.

Next, install some fonts that needed by this stylesheet.
sudo apt-get install fonts-noto-cjk fonts-noto-hinted fonts-noto-unhinted ttf-unifontFinally, we convert this css-like map style definition into XML file. This XML file will be rendered by using Mapnik.
cd ~/src/openstreetmap-carto-AJT
carto project.mml > mapnik.xml
Prepare The Renderer
Then, install mod_tile and renderd. It is used to modify an Apache Web Server so that it can serve map tile request. mod_tile is an Apache module that handles requests for tiles, while renderd is a daemon that renders tiles when mod_tile requests them.
There is a little side note over here :
We'll use the "switch2osm" branch from https://github.com/SomeoneElseOSM/mod_tile, which is itself forked from https://github.com/openstreetmap/mod_tile, but modified so that it supports Ubuntu 16.04, and with a couple of other changes to work on a standard Ubuntu server rather than one of OSM's rendering servers.
Ubuntu 16.04? “Standard Ubuntu server”? Here’s more context, right at the beginning of this article.
This text describes what's required to take a "normal home PC" and to install a tile server on it. The "normal home PC" that I used was a Lenovo H30 (AMD A8-7410 with 1 socket, 4 cores, 8Gb memory, 1Tb of SATA-connected 7200 rpm disk). Following a BIOS change and a Linux installation it's running Ubuntu 16.04 with KDE desktop.
So, maybe if we have a decent and adequate hardware (Debian 11 / Ubuntu 21.04), we could just use “standard mod_tile” installation right from OpenStreetMap official repository, which is pretty easy to install.
apt install libapache2-mod-tile renderdOr, we could use the author’s hacks that supports “standard Ubuntu server rather than one of OSM's rendering servers” :
cd ~/src
git clone -b switch2osm git://github.com/SomeoneElseOSM/mod_tile.git
cd mod_tile
./autogen.sh
# autoreconf: Leaving directory
./configure
# config.status: executing libtool commands
make
# make[1]: Leaving directory '/home/renderaccount/src/mod_tile'
sudo make install
# make[1]: Leaving directory '/home/renderaccount/src/mod_tile
sudo make install-mod_tile
# chmod 644 /usr/lib/apache2/modules/mod_tile.so
sudo ldconfig
Here’s additional warning from Switch2OSM’s web-page :
Serving your own maps is a fairly intensive task. Depending on the size of the area you’re interested in serving and the traffic you expect the system requirements will vary. In general, requirements will range from 10-20GB of storage, 4GB of memory, and a modern dual-core processor for a city-sized region to 1TB of fast storage, 24GB of memory, and a quad-core processor for the entire planet.
Next, configure the renderd by editing renderd.conf file
sudo nano /usr/local/etc/renderd.confSeveral things that you can configure here :
num_threads : If you’ve only got 2 GB or so memory, reduce this from 4 to 2.
XML : File path to mapnik.xml that produced by Carto in the last step
URI : Choose folder name for your url. For example /yourfoldername/. Your tile server URI will be http://youripaddress/yourfoldername
Next, configure the Apache web server. First, make several new folder.
sudo mkdir /var/lib/mod_tile
sudo chown renderaccount /var/lib/mod_tile
sudo mkdir /var/run/renderd
sudo chown renderaccount /var/run/renderd
Then, make a new file : mod_tile.conf
sudo nano /etc/apache2/conf-available/mod_tile.confAdd this following line to that file
LoadModule tile_module /usr/lib/apache2/modules/mod_tile.soSave it, then run
sudo a2enconf mod_tileThen, open 000-default.conf file
sudo nano /etc/apache2/sites-available/000-default.confAdd the following between “Server Admin” and “DocumentRoot” lines
LoadTileConfigFile /usr/local/etc/renderd.conf
ModTileRenderdSocketName /var/run/renderd/renderd.sock
# Timeout before giving up for a tile to be rendered
ModTileRequestTimeout 0
# Timeout before giving up for a tile to be rendered that is otherwise missing
ModTileMissingRequestTimeout 30
Reload the apache twice
sudo service apache2 reload
sudo service apache2 reload
Now, run the renderd.
renderd -f -c /usr/local/etc/renderd.confThen, point a web browser to http://youripaddress/yourfoldername/0/0/0.png (based on your own URI configuration in renderd.conf).
If there’s no error, then you should see a map of the world.
Miscellaneous
As stated in the rest of this article, there are several things to do next :
Run renderd in the background, as a systemd service.
Pre-render some continent-level zoom tile, since it will take a very long time to render.
Auto-update the database with the latest OpenStreetMap data update, by using Osmosis.
Server monitoring, by using Munin.
Here’s the gist of the whole system :


